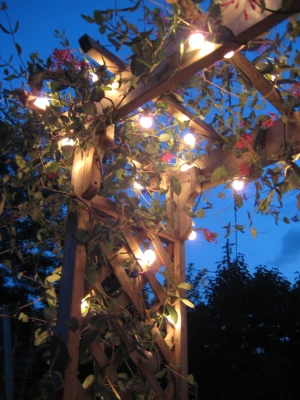
Category Archives: Seeds

Seedling Update


Seedling setup.

It’s been a few weeks since I started my second tray of seeds.  For the most part, nature is taking its course and itty bitty versions of my favorite plants have popped up.  There are a few stinkers in the bunch though, a problem that vexes me year after year.  Why don’t some seeds germinate?

These imapatiens are some of the few that germinated out of a tray of 64.

It’s obvious that conditions are not right for the tray of impatiens I had hoped to grow.  I’m not sure where I went wrong with this one.  A few seeds seem to like the accommodations I’ve provided, but the vast majority do not.  Maybe the starting mix is too wet, or too cold.  My previous experience with starting flowers from seed was extremely successful–I grew six varieties of zinnias, they were so healthy and beautiful.  This tray of impatiens is a pitiful sight.

The good news is that veggies and herbs are thriving.  Thinking about the tomatoes and eggplants that these tiny plants will become makes me happy!  Maybe I’ve started too many plants, but I do this in case there is any trouble.  I like to have some back up plants just in case.  It’s insurance.  Inevitably, I’ll be searching out adoptive  parents for my extra seedlings come Memorial Day.

This tomato is showing some nice leaves. All tomato varieties came up with no problems.

Every day I turn the tray around because these tiny plants lean right into the sunlight.

Noticeably, eggplant and pepper seeds are taking longer than the others.  I hope they come up just fine in the next few days.  I’m trying to keep them warm by putting them on the heat vent at night.  They are getting plenty of warmth from the sun during the day.  I’ve never had a problem with these in the past, so I’m expecting them to pop up eventually.

So what’s the next step?  Well, this weekend I will be transplanting some lettuces and spinach into pots outside.  If we are threatened with hard frosts I can always haul the pots inside or cover with a blanket.

I have begun planting seeds outside.  This week my son and I put in the peas and arugula.  I hope to have the head lettuce and radishes in by the weekend as well.  It’s still cold at night here, but not too cold for these types of seeds.  They even like the cold.

Our weather in Southeastern Wisconsin has been cool, damp and rather dismal.  It’s to be expected, but I long for one of those freakishly warm April days that are just right for working outside and getting that first touch of sun on my white wintry skin.  Wouldn’t some warm sun feel good about now?  I think my plants would agree.

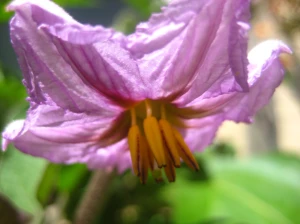
I’ve been taking my rosemary and lemon tree outside during the day.  They’ll need a few weeks of this to adjust to outdoor conditions.  The lemon tree has set some new buds and I’m hoping that taking it outdoors will toughen it up enough to hold onto those buds rather than dropping them like the last set.  In a few weeks I will pot it up to the next size of pot and add organic fruit fertilizer to the mix.  With any luck it might produce a lemon or two this year.  Now if I could just get some bees to come back to my yard to take care of pollinization–that lemon tree’d be all set!

A new set of lemon tree buds brings new hope that this tree may produce fruit in 2011.

I’ve always enjoyed videos that show how a seed grows (thanks to my 80’s childhood watching Sesame Street I’m sure) so here is a link to a nice example from Nova:  Teachers’ Domain: From Seed to Flower.

It’s the beginning of an exciting time of year for me.  A time of hope and expectation, a time for work and play.  It’s off to a good start!

Seed Starting


March is here and with it comes the task of transforming tiny seeds into herbs, vegetables and flowers for my (slowly) thawing garden.

But first, a confession.  I’ve been struggling for a week to write this post.  I think that writing from an instructional point of view isn’t working for me.  Since there are so many resources available on seed starting, I’ve decided that rather than give instructions I’m just going to report my experience and forget a step by step analysis.  It just isn’t my style. 

Whew!  Now I feel free to write.

Being a visual person, I like to map my garden, I also like to map my seed trays.  This seems to work better for me than using seed markers, and it feels like less work to me.  I especially like color coding my seed tray map!

I use a different color for each type of seed.

My kids' crayons come in handy for this project.

As it turned out, the above map–while lovely–did not have the correct layout for the 72-cell trays I am using.  So I had to redo it.  Such is life. 

For this tray, I’m starting some random things that seem like they need more time than others.  This works out well because by the time these seedlings are done with this tray I’ll be ready to start some more seeds.  I have two trays and will probably use each one twice this season.  I’m growing some flowers from seed this year, and they’ll take up at least one tray on their own.

I use a standard plastic 72-cell tray.  These trays come with a drip tray that the cell insert sits in, and a lid.  It’s easy to purchase extra cell inserts as needed from my local garden center.

I always read the seed packets before starting seeds.  Here is where I can find out when to start the seeds, any special information such as planting depth, sunlight needs, etc.  Seed packets contain all the information I need to be successful. 

Seed packets for Impatiens.

The back of the seed packet is loaded with information for seed starting, transplanting, growing and harvesting.

This seed starting mix came from Gardens Alive.  I had a coupon for $25 off (I believe every catalog they send has a coupon of some sort) so I used that to order some trays and seed starting mix.  It’s just as easy to visit a local garden center or hardware store and pick up needed materials.

My seeds have come from many different sources this year.   I purchased some at the garden center, others I ordered from Johnny’s Seeds, Seed Savers Exchange and Baker Creek Heirloom Seeds.  I wanted to try several sources to compare, and also just because it’s fun to collect seeds from various sources.  I like the different seed packets.    It’s been fun going through the catalogs as well and receiving orders in the mail. 

Using my map I carefully put the seeds into each cell after the soaked seed starting mix was in place.

Seed starting mix works well.


We added water to the mix and spooned it into the tray.


Alternatively, you can put dry mix in the tray and then add water.


Once the seeds are in, the tray goes to either a sunny place or a warm place out of direct sunlight. I had one tray of each, this information is on the back of the seed packets.


I either put the tray in my bathroom, where it is always very warm, or if the seeds require light for germination they go next to the patio door where it is warm and sunny.  Trays in the bathroom are moved to the patio door once the sprouts emerge.

Current setup--my mini greenhouse.


My son and I love to peek at the seed trays every day to see what has poked through.  It’s amazing how quickly they change, sometimes they can grow an inch or more in less than 25 hours.

Here's something coming up!


It’s not hard to start seeds.  I’ve been doing it for a few years now and have always been pleased with the results.  It’s much more affordable than buying plants at the garden center, and there is no limit to the varieties I can grow when I start the seeds myself.  I’m not limited by what a store may have in stock.

It’s certainly possible to be a lot more scientific about this process.  That’s just not me though.  I do this by look and feel and rarely consult the numbers.  I don’t really know what the temperature is in my bathroom or how many days it takes for seeds to germinate.  I don’t really care.  (Sorry!)  If they come up, I’m happy.  I move them to bigger pots as needed and when the weather feels good, I put them outside.  I guess this goes to prove that it’s really not that complicated to grow things at home!  I just follow the directions and that seems to work.

Now, I can’t wait to get everything outside and out of my dining area.  But for at least the next 6 weeks, the seedlings and I will just be hanging out waiting for the earth outside to come alive again. 

I just finished reading The Secret Garden by Frances Hodgson Burnett and want to share this passage in which Dickon describes Spring:

“Just listen to them birds—th’ world seems full of ’em—all whistlin’ an’ pipin’,” he said. “Look at ’em dartin’ about, an’ hearken at ’em callin’ to each other. Come springtime seems like as if all th’ world’s callin’. The leaves is uncurlin’ so you can see ’em—an’, my word, th’ nice smells there is about!” sniffing with his happy turned-up nose.”

Now isn’t that nice?  It’s almost here!

Garden Tutorial


White Flower Farm has produced some wonderful garden “how to” videos.  Check it out:

A February Kind of Project


Inspired by the salad mixes I’ve seen in the grocery store lately, I thought I might try to grow some herbs indoors to add to salad greens.  I especially like some cilantro thrown in to a salad, and since I use parsley and basil weekly anyway, they seemed like nice additions too.

My initial idea was to plant them in the cans I had leftover from my recent mega batch of chili.  Then, over the weekend while perusing a magazine, I saw this:

Herb-in-a-Can project on the pages of this month's Birds and Blooms.

Well, I guess someone else had the same idea.  At least I know it works!

And so I’ve recruited my kids to help.  Here is our herb project in photos:

Empty cans are a nice size for growing some herbs.

Not pictured is my husband using some sort of power tool to make drainage holes in the cans.  It’s important to provide a place for water to drain out of, and into.  Once these cans are planted, they will be put on a tray with pebbles or marbles underneath them to allow for proper drainage.

Next, let your child play with the cans. (This step is optional!)


We filled the cans with a soiless seeding mix.

Prepared for the mess, I covered our workspace in newspaper.

Cans are filled with mix, water is added and then some more mix to fill. Sure glad I put the newspaper down!


Seeds selected for this project: parsley, cilantro and bush basil.

We labeled the cans before we put the seeds in, just to be safe!

My son sprinkles the seeds on, we then cover lightly with the soiless mix.

Finally, the seeds are given a spritz of water.

Ready to germinate.

My next step will be to add the pebbles to this tray, then stash it in the bathroom until the seeds germinate.  Wait–did I just say the bathroom?  Indeed!  It’s the warmest room in our house and we always take advantage of the heat in there to germinate our seeds.  I do not have to use heat mats or grow lights to start seeds.  Bonus: the emerging seedlings LOVE the steam from the shower.

I’ll be sure to keep readers posted on this project!

Tomato Picks


So many tomato transplants, so little space.

We live in the city which can be very convenient.  Who wouldn’t want to be 5 minutes from downtown dining, professional sports, museums and theatre?  Not to mention our proximity to Lake Michigan… I can walk there in ten minutes!  But what city dwelling lacks is gardening space, and for a gardener that can be kind of annoying. 

I am learning to work with my space.  And I’m learning restraint.  It’s time to order tomato seeds, and while I am drooling over the gorgeous photos in the seed catalogs, I’m reminding myself that my garden can only handle 4-6 tomato plants.  So don’t go ordering all those tomato seeds!  It’s hard to resist the countless varieties that all hold their own promises of flavor, texture and beauty.  I want them all.

Here’s the plan for 2011, which is (as always when it comes to gardening) subject to change at any time.  I will put four plants into my raised vegetable bed as I did last year.  It’s easy to access the plants on the corners of the raised bed.  I will put two additional plants in nearby pots, and hope for the best.  I’ve planted in pots before with mixed results.  The key is consistent watering.  Same thing with the Topsy Turvy, but I’m not going there this year.

These descriptions are straight off the websites from which I’ve purchased the seeds.

Italian Heirloom (Seed Savers Exchange)
Outstanding heirloom from Italy. Plants are loaded with red fruits weighing over a pound. One of the most productive varieties we have grown at Heritage Farm. Excellent full tomato flavor. Ideal for slicing and canning—very little waste and easy to peel. Indeterminate, 70-80 days from transplant.

Nebraska Wedding (Seed Savers Exchange)
The “ultimate love apple” according to Amy Goldman’s colorful story in The Heirloom Tomato. Nebraskan brides reportedly still receive these seeds as a wedding gift. Listed in the 1983 SSE Yearbook by Dorothy Beiswenger of Crookston, Minnesota. Reliable producer of stunning 4″ round fruits with glowing orange skin. Well-balanced flavor. Plants typically grow less than 36″ tall, but benefit from staking. Determinate, 85-90 days from transplant.

Tommy Toe (Seed Savers Exchange)
Exceptionally vigorous plants yield hundreds of large red cherry tomatoes throughout the season. The superb flavor won it top billing over 100 other varieties in an Australian taste test. Indeterminate, 70 days from transplant.

Wisconsin 55 OG (Seed Savers Exchange)
Bred by JC Walker at the University of Wisconsin in the 1940s. Excellent all-purpose tomato, great for canning. Does best on rich soils. Remembered as one of the best home and market tomatoes in the Madison, Wisconsin area. Indeterminate, 80 days from transplant.

Green Zebra (Baker Creek Heirloom Seeds)
One of my favorite tomatoes. Beautiful chartreuse with deep lime-green stripes, very attractive. Flesh is bright green and very rich tasting, sweet with a sharp bite to it, (just too good to describe!). A favorite tomato of many high class chefs, specialty markets and home gardeners. Yield is excellent. The most striking tomato in our catalog, a real beauty. Around 3 ounces each.

Chocolate Stripes (Baker Creek Heirloom Seeds)
NEW! One of the most amazing tomatoes we have ever grown. For both color and taste this variety excels. Fruit is deep reddish-brown inside,
the outside is covered with beautiful orange and lime colored
stripes. One of the most unique looking tomatoes we have ever tried. It is very sweet and yet has a full-rich flavor, and this is the reason this tomato places very high in taste tests. A favorite here with the staff at Baker Creek. Fruit is medium to large and are of a slightly flattened globe shape.

Wow!  Sounds like a delicious summer is ahead.  These tomato descriptions make my mouth water.  I simply can’t wait for that first taste of a garden tomato. 

For quality seeds and incredible variety:  Baker Creek Heirloom Seeds or Seed Savers Exchange.

I say Tomato!


Cherokee Purple tomato prior to ripening.

Perhaps nothing says “summer garden” more in this country than that ubiquitous garden veggie–er, fruit–the tomato.  Even those who grow nothing else might consider a tomato plant in a container, because as we’ve been told a thousand and one times: There is nothing better than a fresh picked tomato right from the garden.

And as oft as that phrase has been spoken, it really is true.  Garden tomatoes are good.  Really good.

I only have room for four tomato plants in my raised beds, with a possible fifth or sixth plant lurking nearby in a pot.  Tomato plants can be big, and many of them have a tendency to sprawl and get really tall only to collapse onto themselves when the weight of their fruit becomes more than they can support.  Or they get all bent out of shape during a windy summer thunderstorm and suddenly what was once a well-formed plant occupying the planned space becomes a mass of leaning and reaching vines invading other garden territories.  A gardener with a small space must choose wisely.

And so now it’s decision time.  I’m carefully reading the tomato descriptions in my stack of seed catalogs, trying to find just the right mix of 4-6 plants that will grace our garden this year.  If only I had room for 20 plants!  We need something big and juicy for sandwiches and burgers.  We need perfect salad tomatoes to throw in with all the salads we eat from our garden, the ones made with lettuces, spinach and greens.  The other salads made with beans, grilled eggplant and peppers, or herbs. 

We need the ideal tomato for caprese salad.  It must sing on the plate with fresh mozzarella and basil.  Don’t forget the olive oil!

The kids will want something to pick and eat in the garden–a fun little cherry tomato.  Something that is sweet with just a bit of acidity that pops in your mouth with you bite down.

And then there is always the great experiment.  The variety that I grow simply because I haven’t grown it before.  Something unique, heirloom, loaded with promise.  This is the tomato for the gardener. 

Being 50% Italian, it grieves me to grow a garden void of paste tomatoes.  I long to grow enough tomatoes to make and bottle (or freeze) sauce.  Two years ago I attempted to grow a few paste tomato plants, only to have the weather thwart my plans.  I felt like I could have used my space more wisely, and so from now on I will.  But I will hold onto my dream of a large harvest of San Marzanos or Amish Pastes.  I have a feeling this is in my future someday.

So what am I growing this year?  I’ll let you know as soon as a final decision is made.  I won’t take too long to decide.  But in the meantime, I’ll share some tomato photos from gardens past.  (I only started photographing my garden in the last couple years, most photos are from 2009–a cold and dreary year–and 2010 which was wonderfully warm and sunny.)

Sapho tomatoes cascading on the vine.


A family of Gurney Girls making the transition from green to red.


A Beefsteak tomato plant of 2009.


These tomatoes are like the exclamation point on this bowl of garden veg.

Swiss Chard: Too good to pass up!


 I wonder if rows of swiss chard lined the Garden of Eden?  In my imagination this brightly colored, nutrient packed, tasty leaf would be right at home in God’s perfect garden.

After all, swiss chard is super easy to grow… God would have plenty of time for working on the rest of Creation.

In my (less than perfect) garden, swiss chard also found a home.  Due to the tiny nature of my patch of earth, my swiss chard took up residence behind the air conditioner.

Swiss Chard "chillin" behind the air conditioner.

I purchased Bright Lights Swiss Chard seed from Johnny’s Seeds and hoped for the best.  By mid-summer, I was in awe of the light show behind my a/c.

A rainbow of Bright Lights stems.

Swiss Chard leaves looking mighty fine.

You can see in the above photo that we humans weren’t the only ones enjoying the swiss chard buffet last year.  We had our share of insects in the garden in 2010, and this (and the spinach) seemed to be a favorite hangout.  While it was a bit of a nuisance, overall the bugs didn’t do too much damage and we were able to use all of our chard, even the holey ones.
 

Intricate red veins adorn the Swiss Chard.

Here are three great recipes we enjoyed last year using swiss chard from our own garden:

Swiss Chard is great raw in salads, tossed on top of a piping hot pizza, sautéed and seasoned with red pepper flakes, shredded and made into a slaw with raisins and nuts, or mixed with your favorite grain–rice, quinoa, couscous, pasta, whatever!

Of course, the finest swiss chard experience takes place in the garden, when the chard is young and tender.  Just snip and eat right there.  It doesn’t come any fresher and appreciation for this beauty won’t be any greater.

But don’t wait till summer standing around in your garden to eat swiss chard!  Eat it now.  Grocery stores are selling swiss chard in bunches–often there are two or more varieties to choose from.  It’s a great winter vegetable, and can be found in winter farmer markets along with other leafy wonders such as kale and spinach.  It’s a good time to try (or retry) swiss chard and think about adding it to the garden this summer.

Seed Catalogs


When the snow is blowing outside my window, I can usually be found with my nose in one of these:

Various seed catalogs.

January and February are the perfect time to gaze longingly into a seed catalog and dream of gardening days to come.

After all, they don’t show any pictures of weeds in the catalogs, and the veggies are all shown at their peak of summer perfection. It’s easy to imagine how glorious my own garden will be.

I also imagine how things will taste.  That luscious red tomato?  Divine.  That perky little leaf of lettuce?  Refreshing.  Those early spring peas fresh off the vine?  So sweet.

Then my mind reels with the endless possibilities of how to prepare this rainbow of bounty I’m sure to grow in my fairy tale garden.  A head of garlic?  Roasted and spread onto a baguette, sprinkled with those happy little herbs in the herb garden.  Peppers?  Grilled, peeled, thinly sliced and served on a herbed crust with fresh mozzarella.  Eggplant?  A savory eggplant parmesan in fall, but for summer?  Simply sliced and grilled with a brush of olive oil and a sprinkle of salt.  Perhaps I’ll put this on my burger bun instead of the meat.  Complete it with a juicy tomato slice and life is good.

I can almost feel the sunshine on my shoulders as I tend this garden of my imagination.  Boy, does it feel good!

I gather as many seed catalogs as I can find during the winter season.  There is something special in all of them.  The quirkier ones are especially fun.  The full color ones really take me away.  I love reading them almost as much as I love reading cookbooks, but that is another post entirely!

By the end of this month I’ll be placing seed orders in preparation for starting the seeds in March.  Reality starts to set in when I have to think more practically about how many of each plant to grow, guessing how many might actually germinate and then thrive (always to my surprise) in my indoor growing environment known as the kitchen.  It becomes a numbers game and I might suffer gardener’s remorse more than once if something doesn’t work out.

But for now, on my couch with the seed catalogs, everything is gorgeous, there are no weeds and the possibilities are as endless as my imagination.